Menu

Show posts

This section allows you to view all posts made by this member. Note that you can only see posts made in areas you currently have access to.

Show posts Menu

Messages - SteveCuster

#16
Kit Building / Re: Showcase Miniatures Val-U Fuels
January 31, 2022, 08:54:33 AM
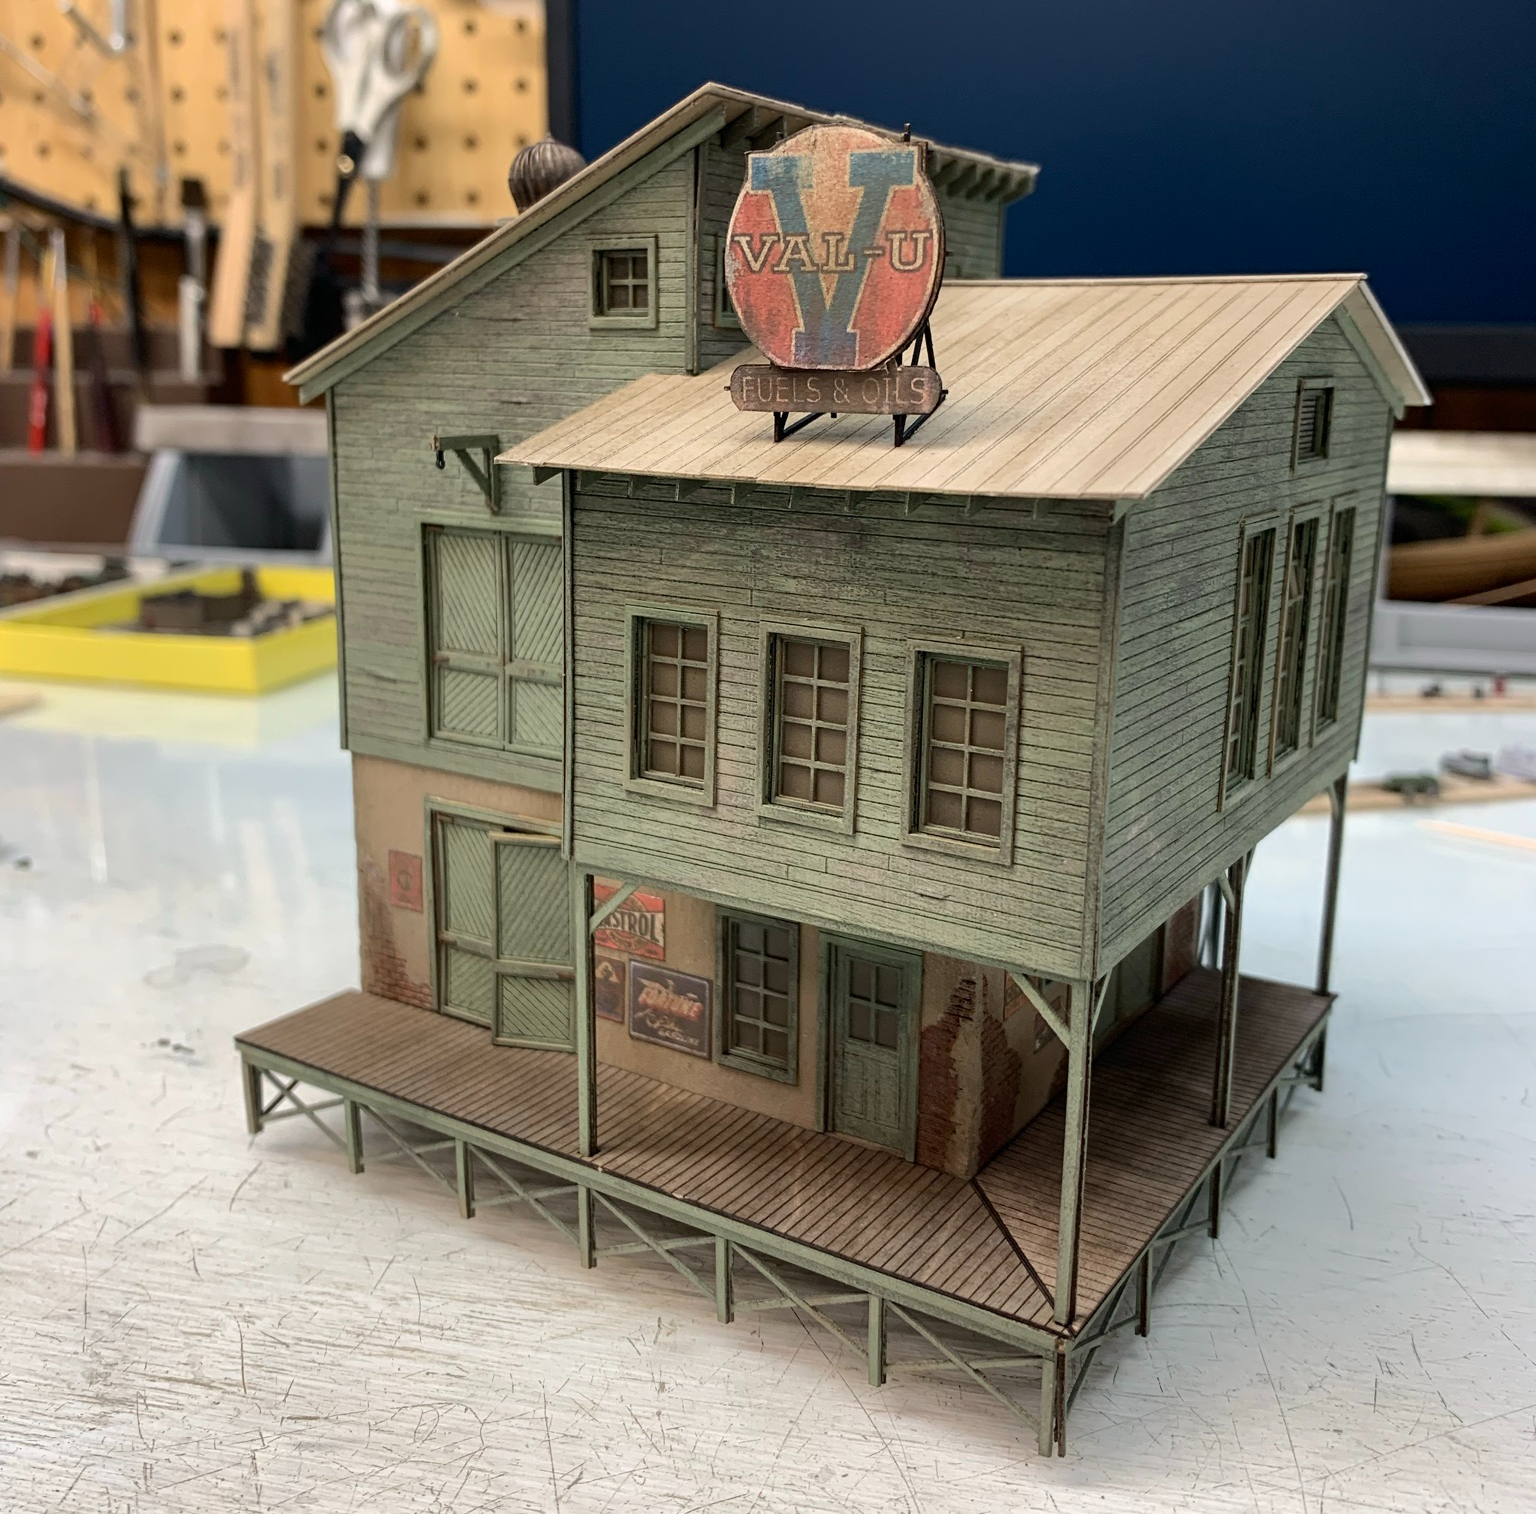
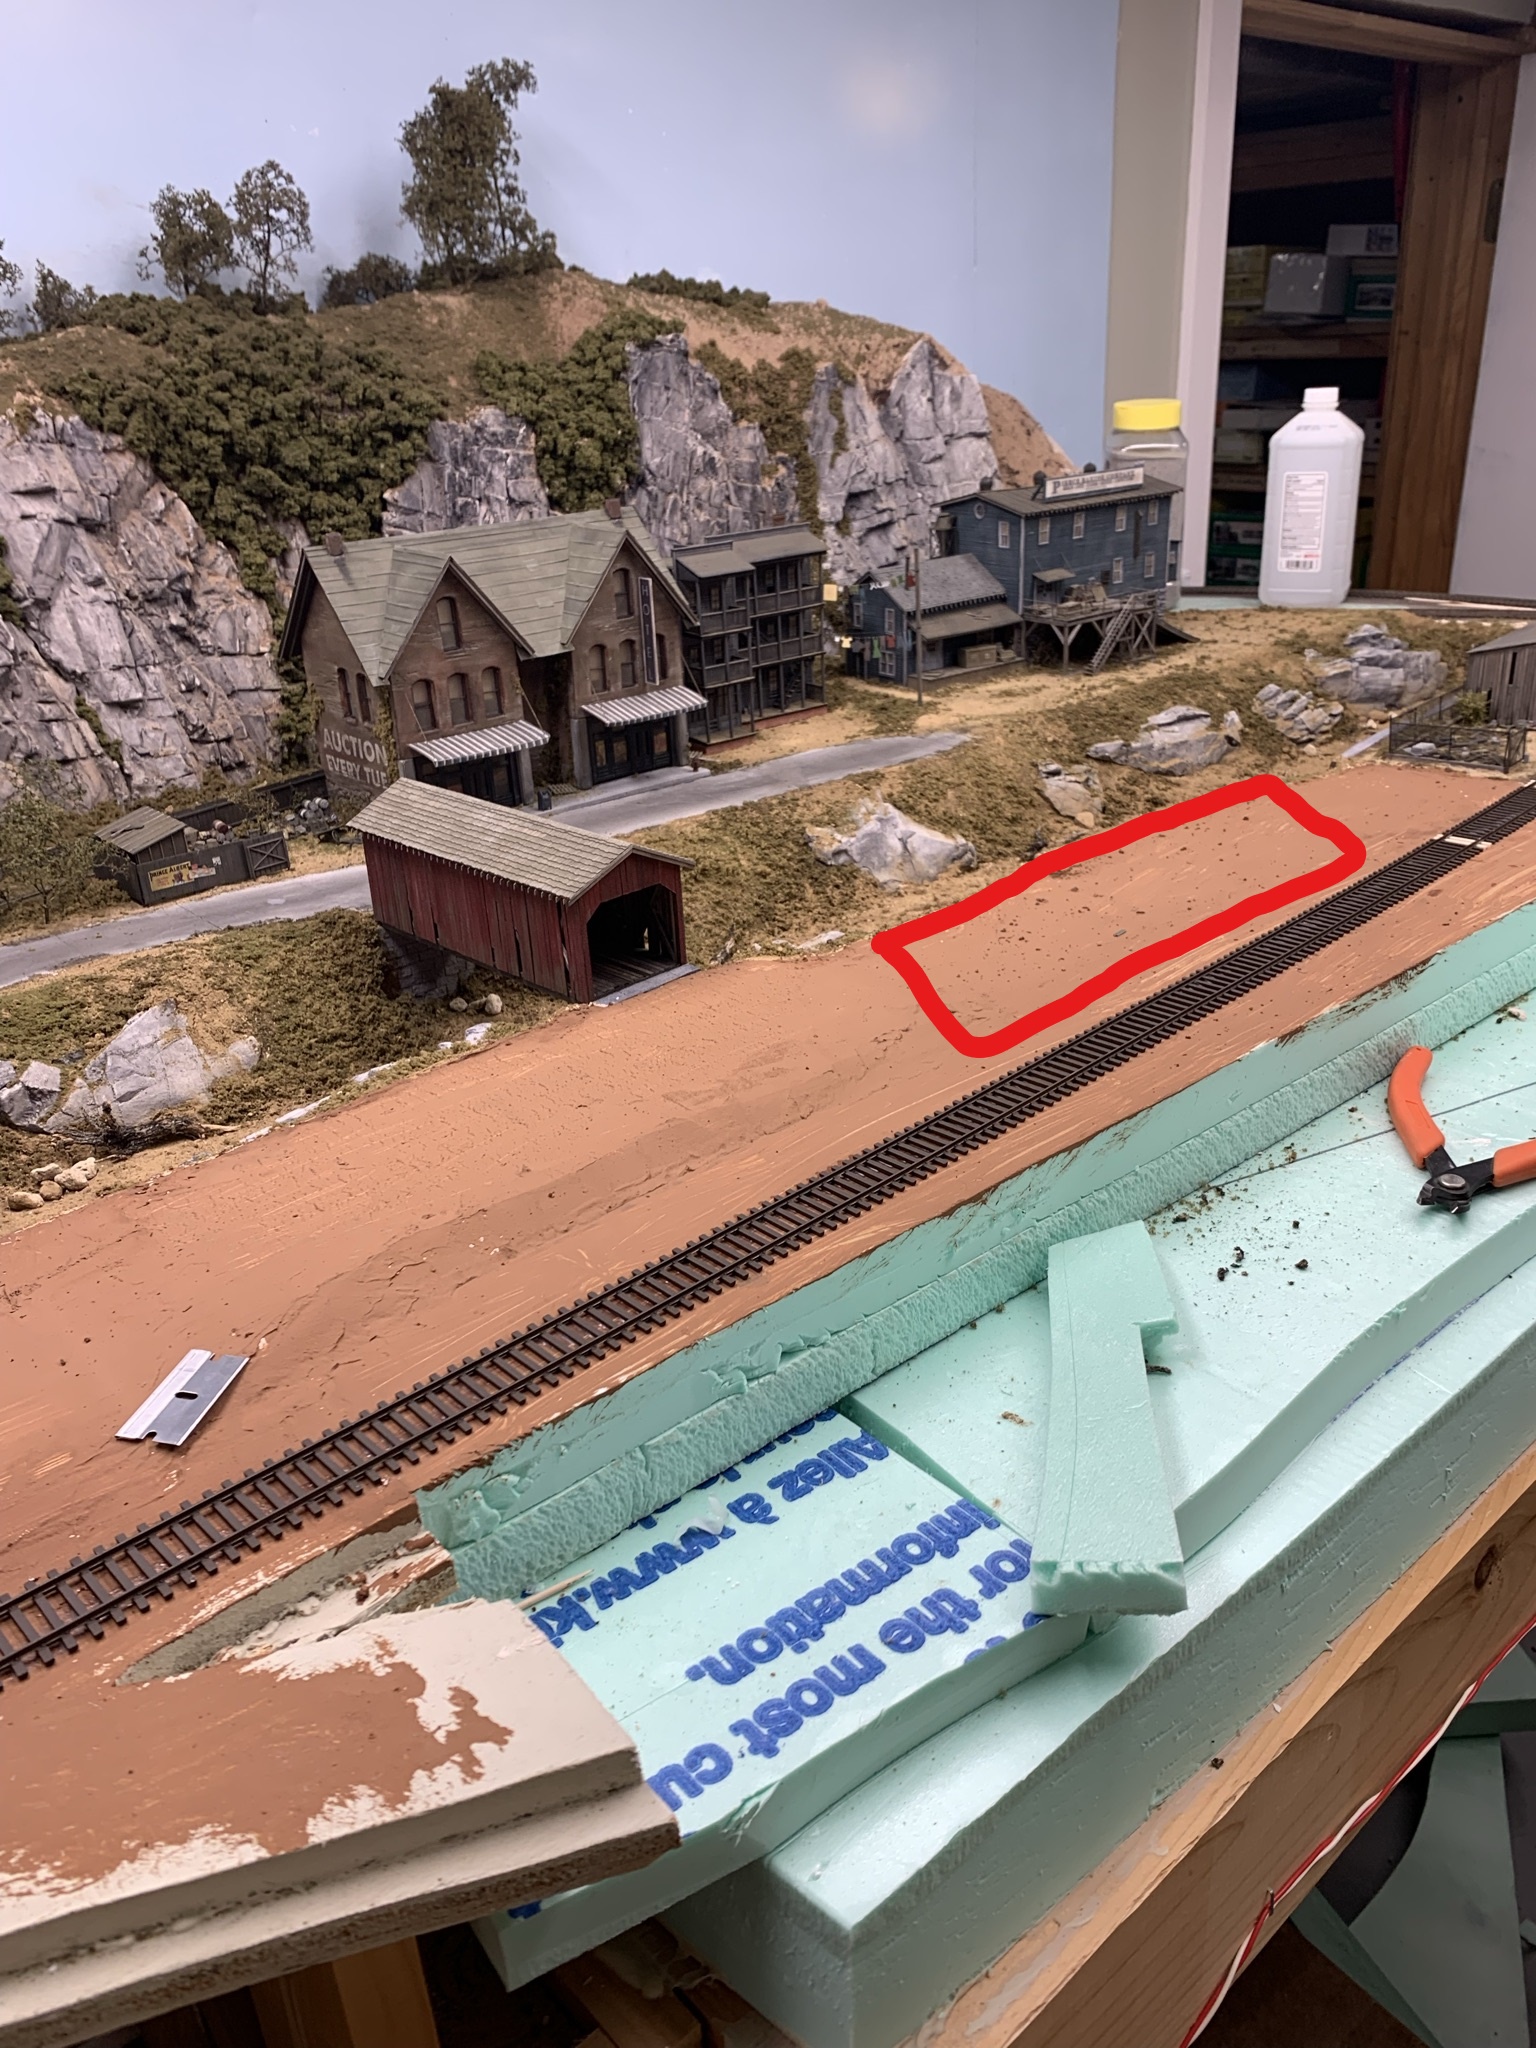
Over the weekend I installed the structure on the layout and started adding some details to the docks and around the building..


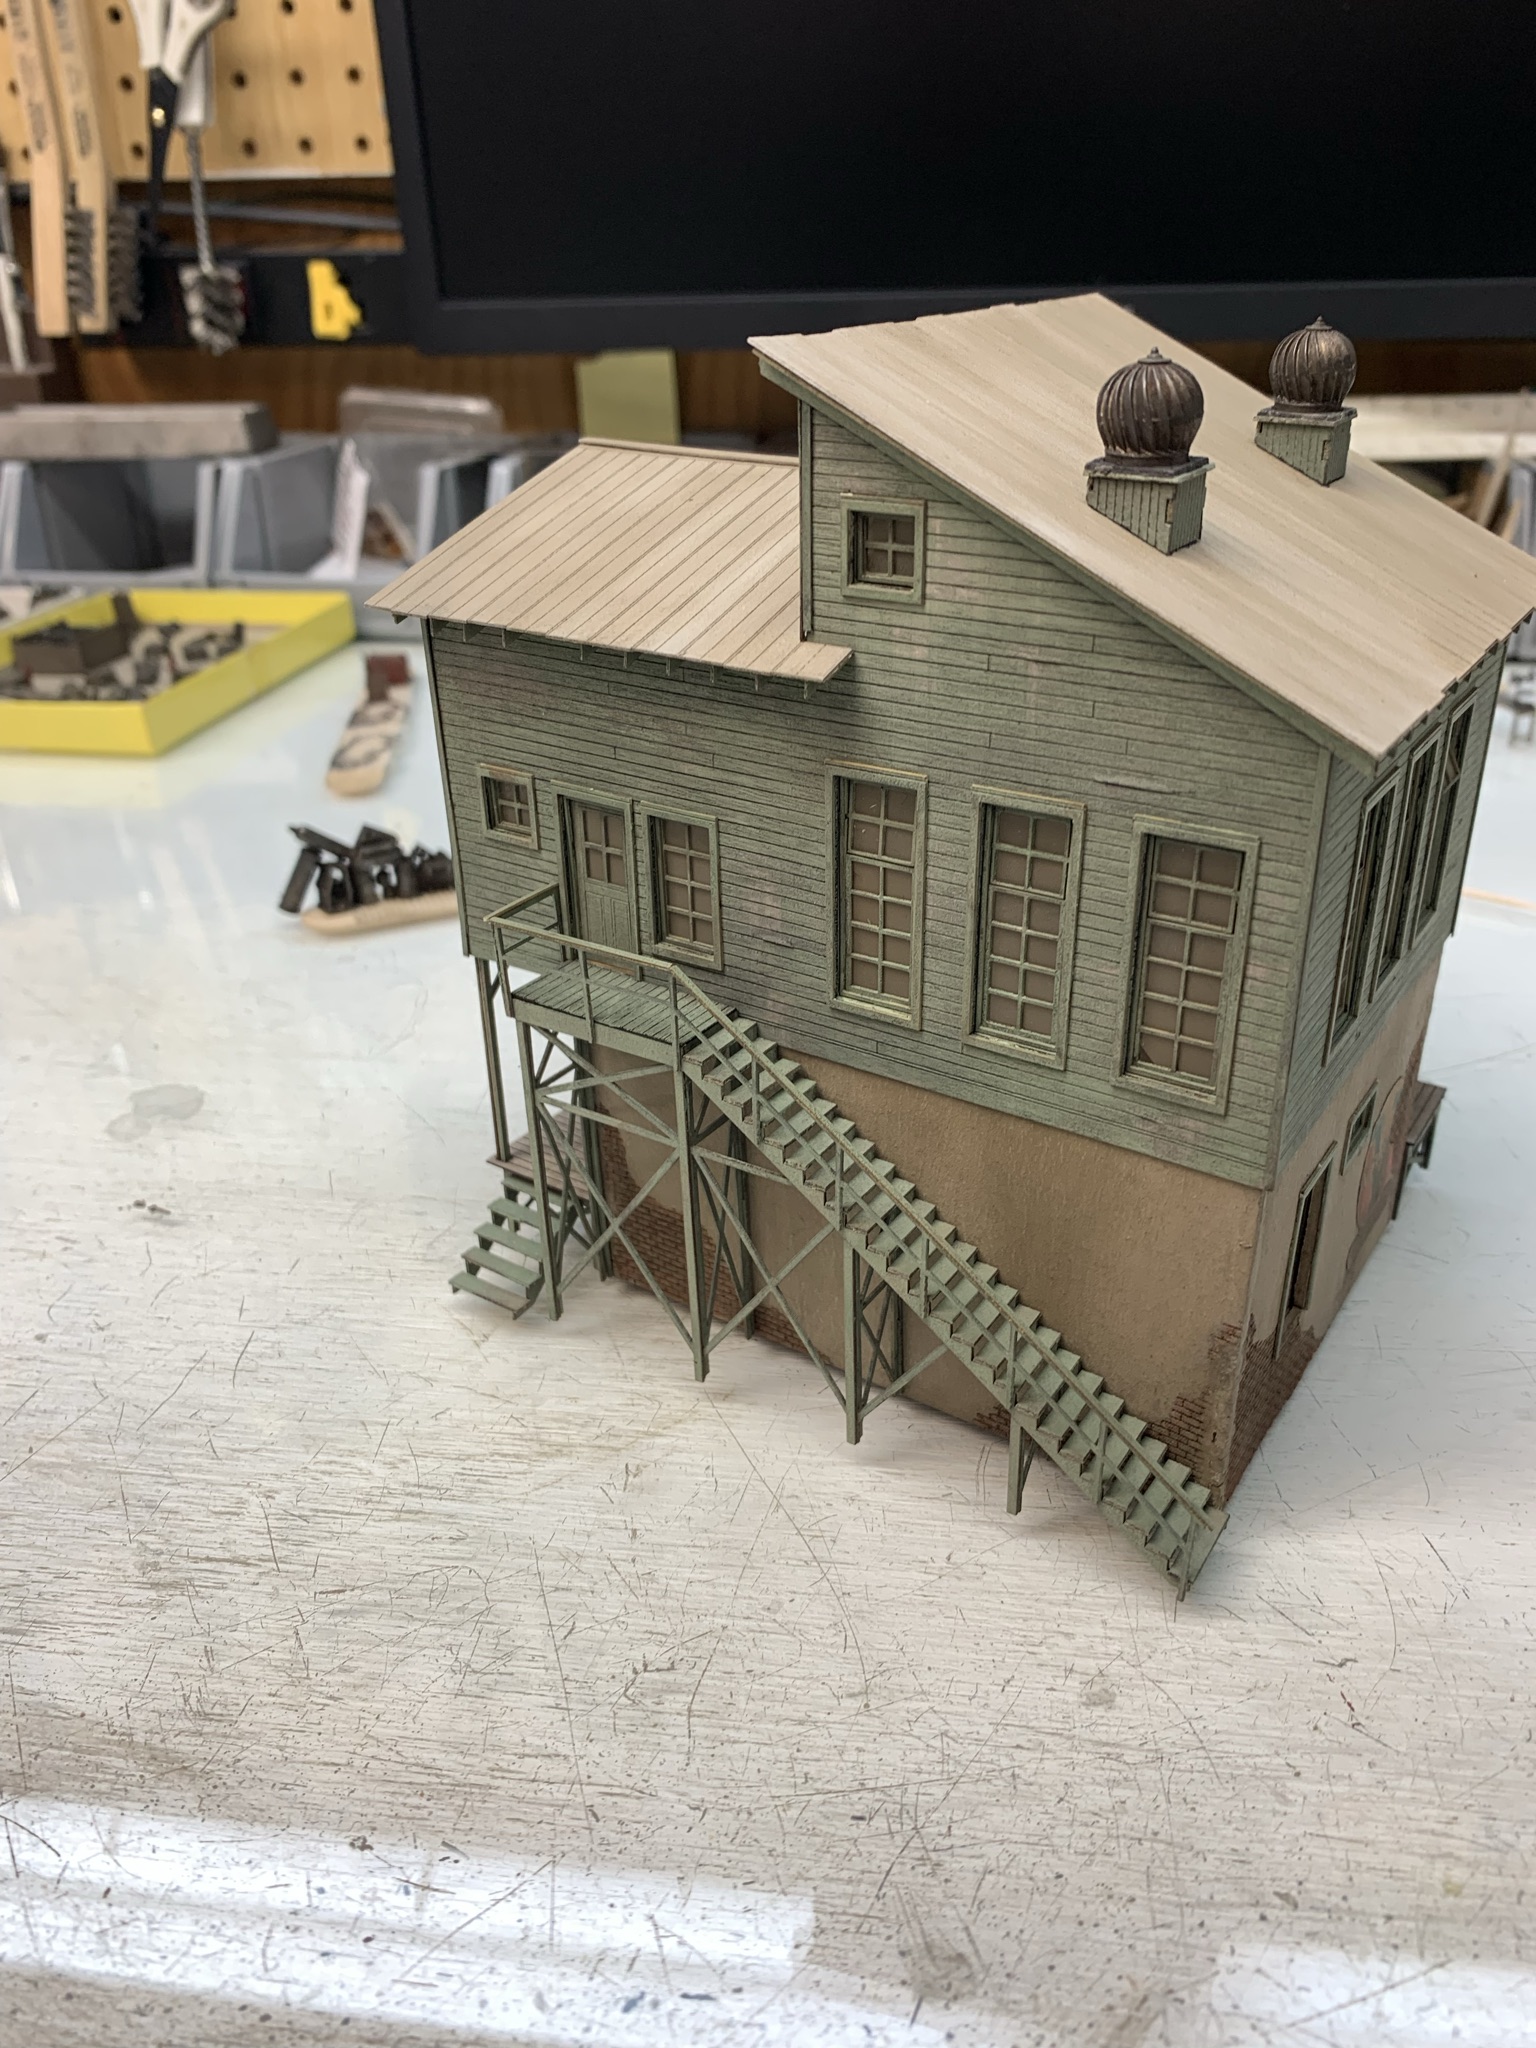
Ground cover is still wet in this picture.


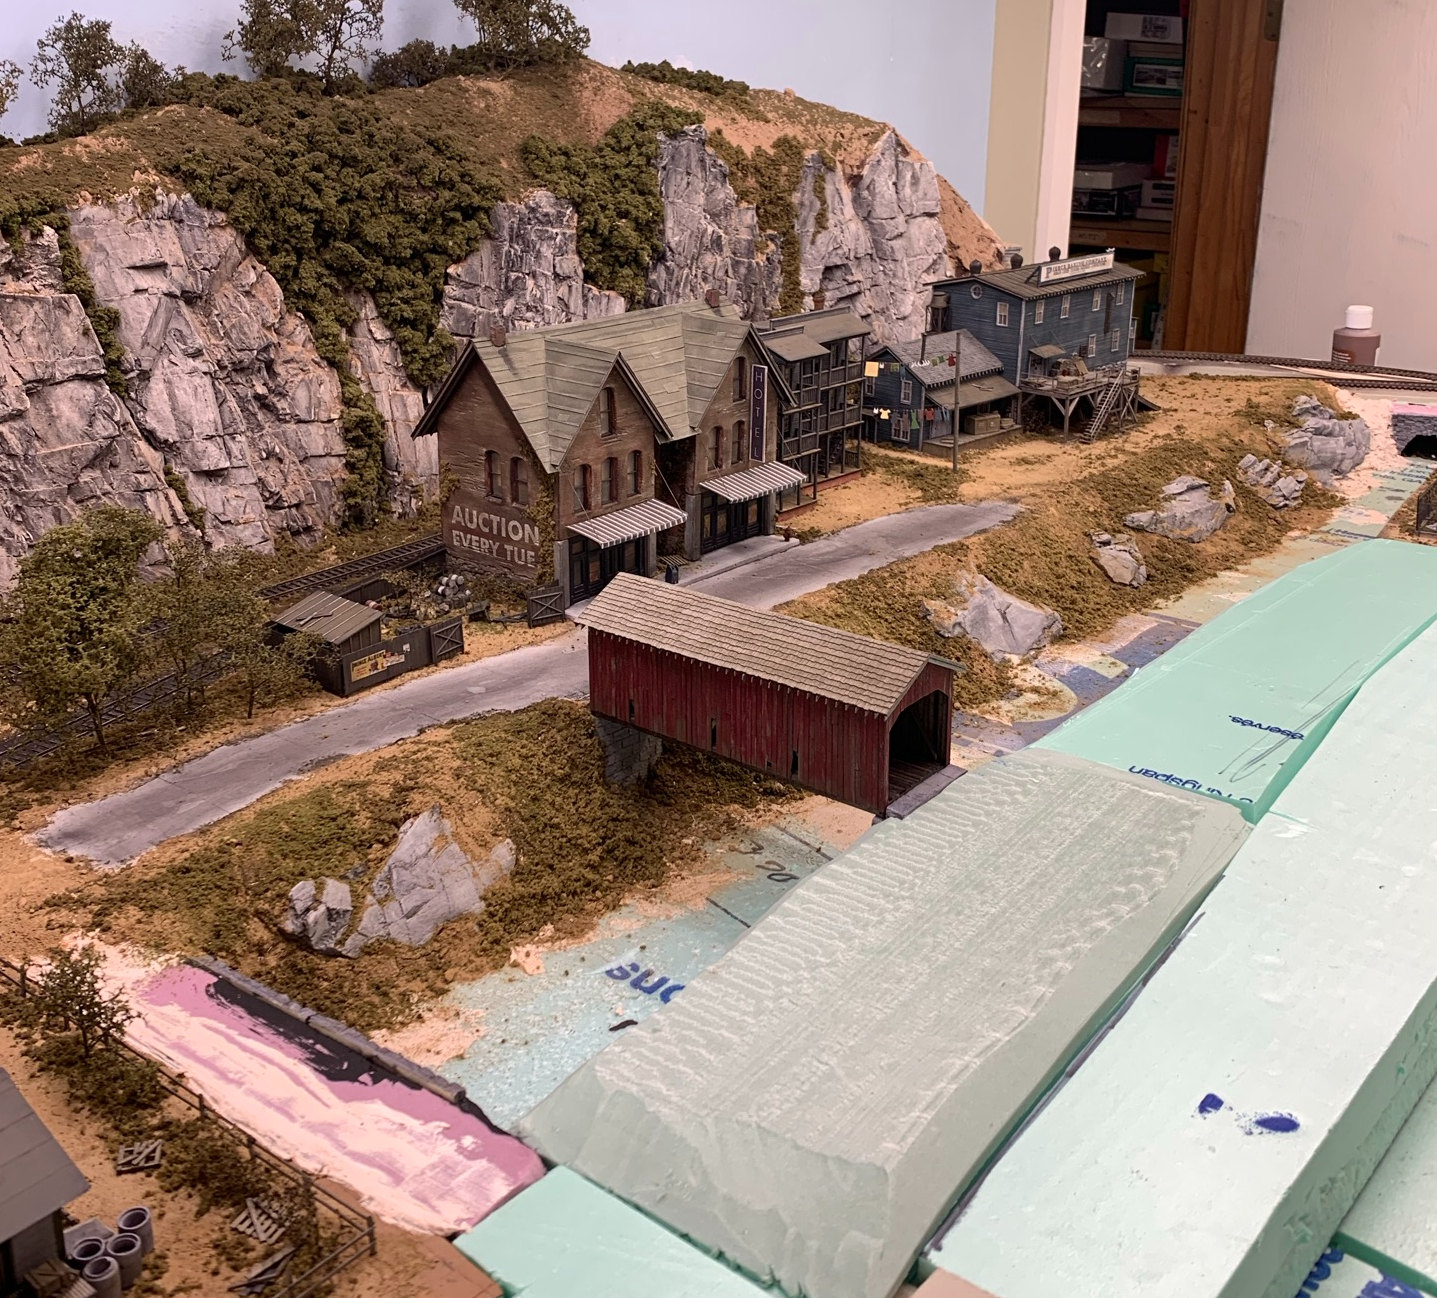
More of an overall shot of its position.


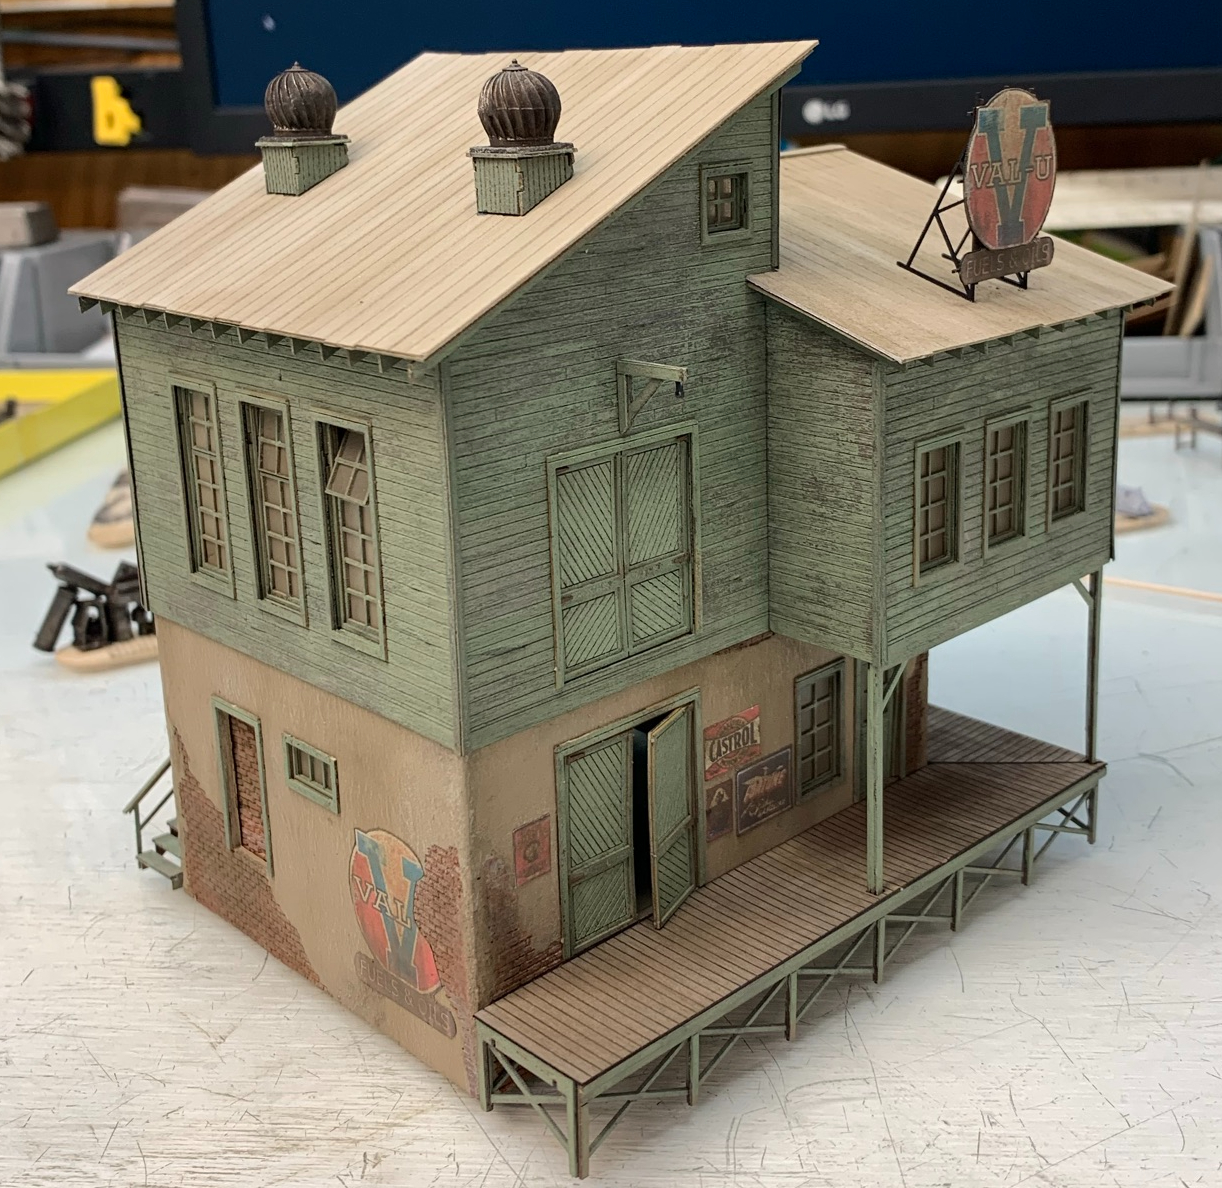
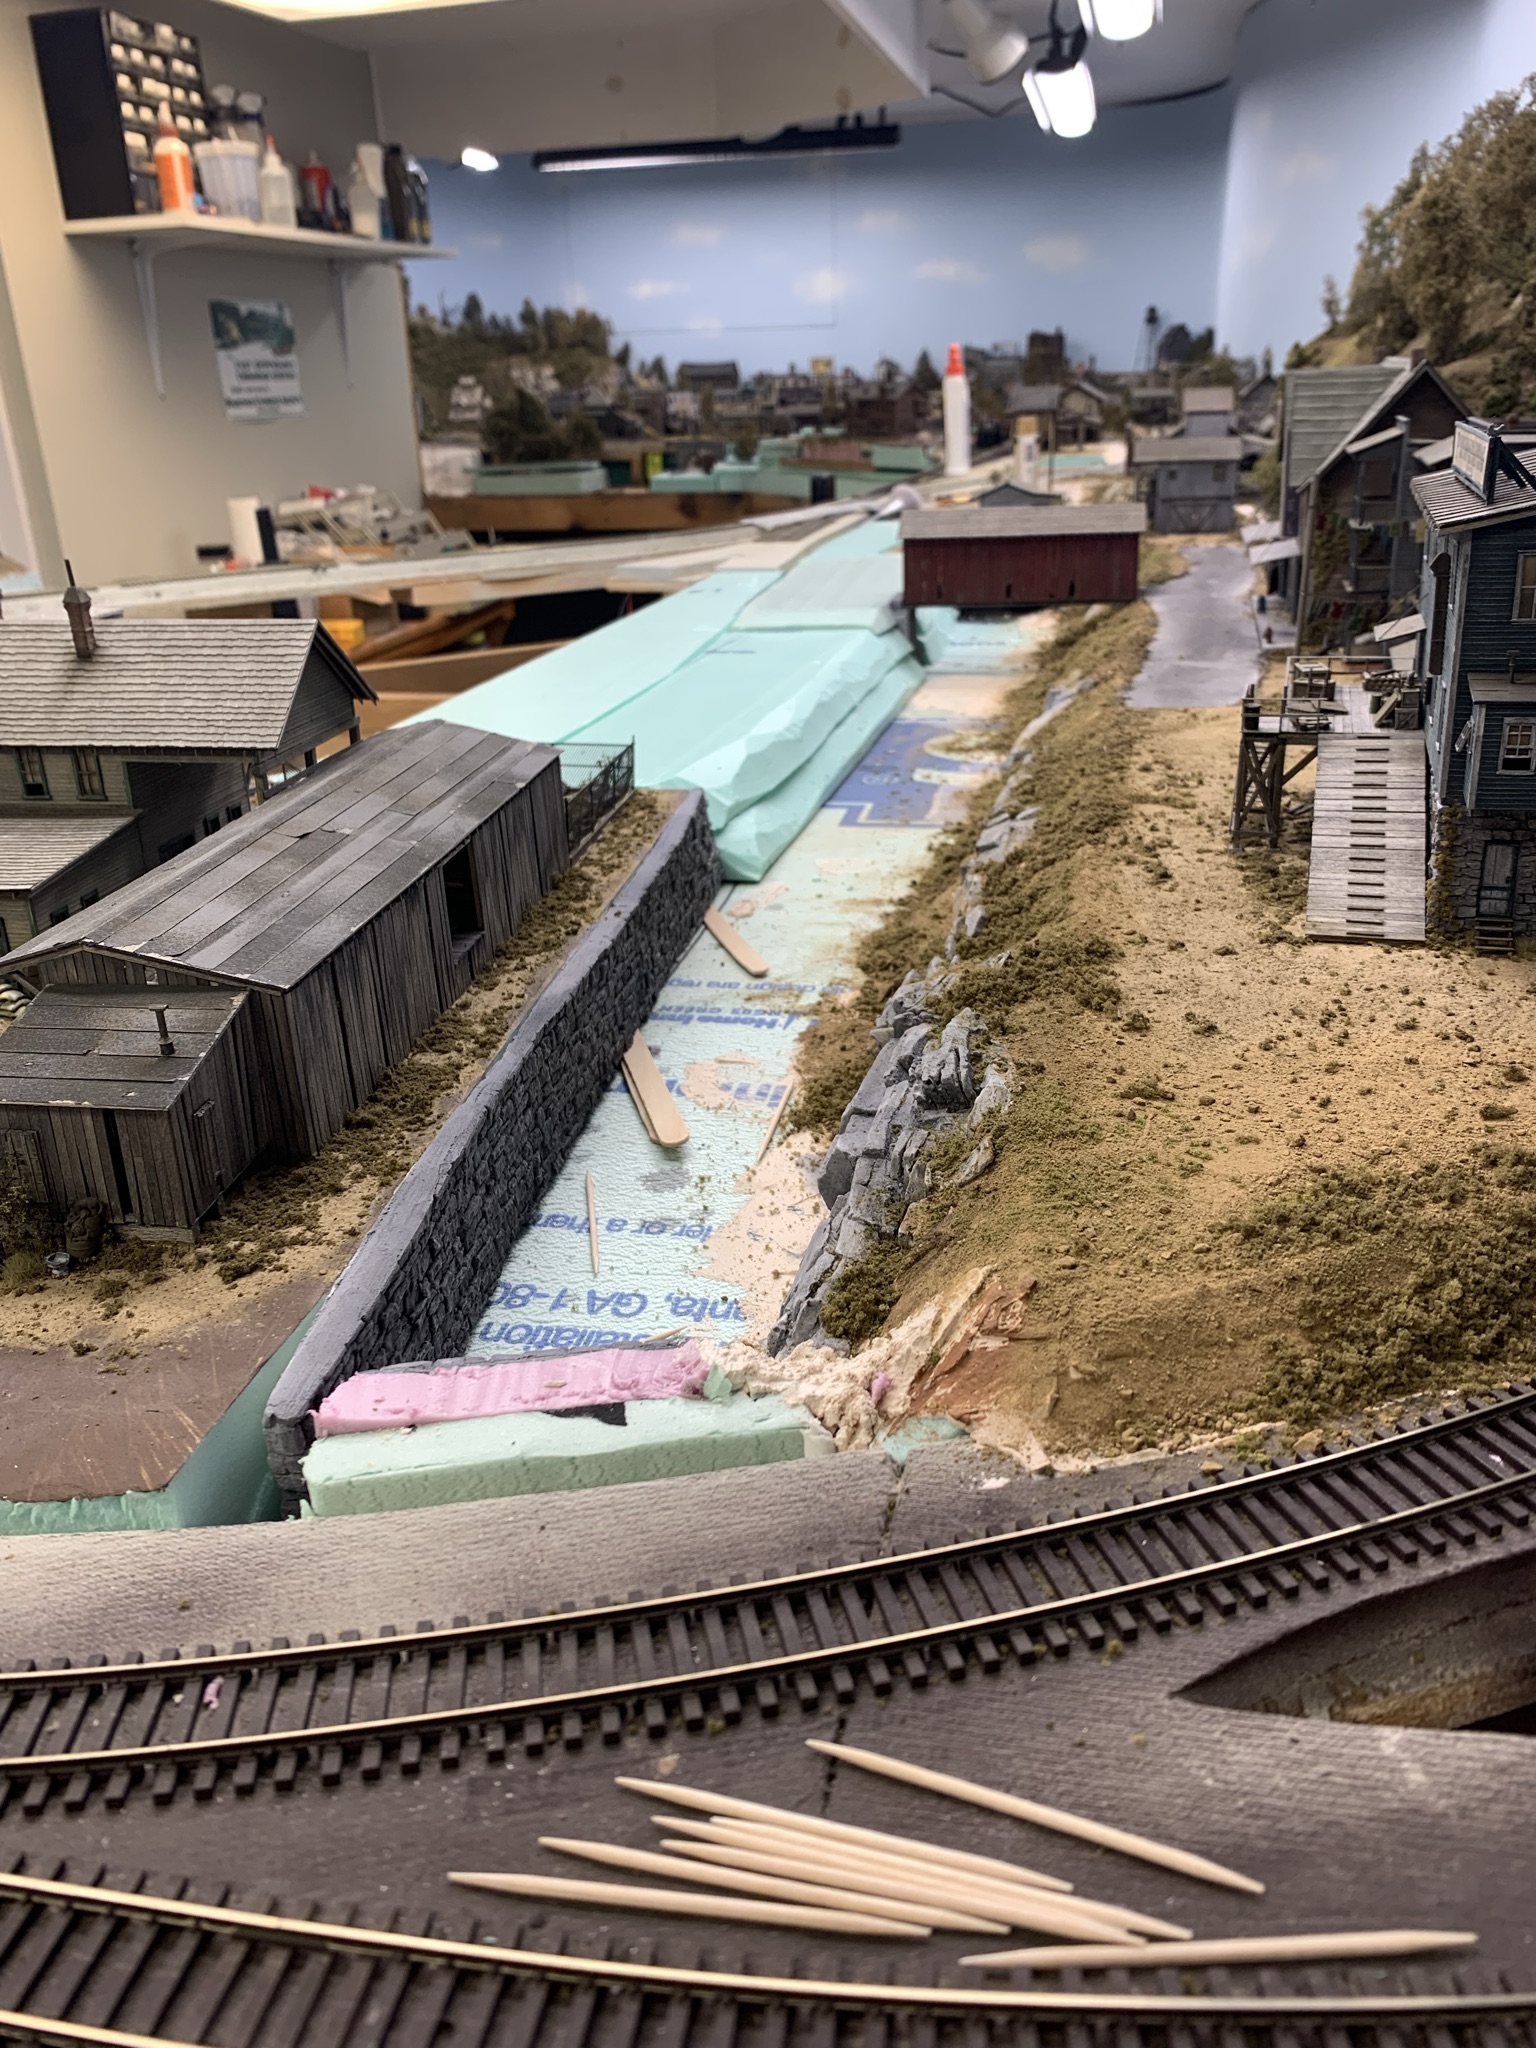
The other side of the loading dock..


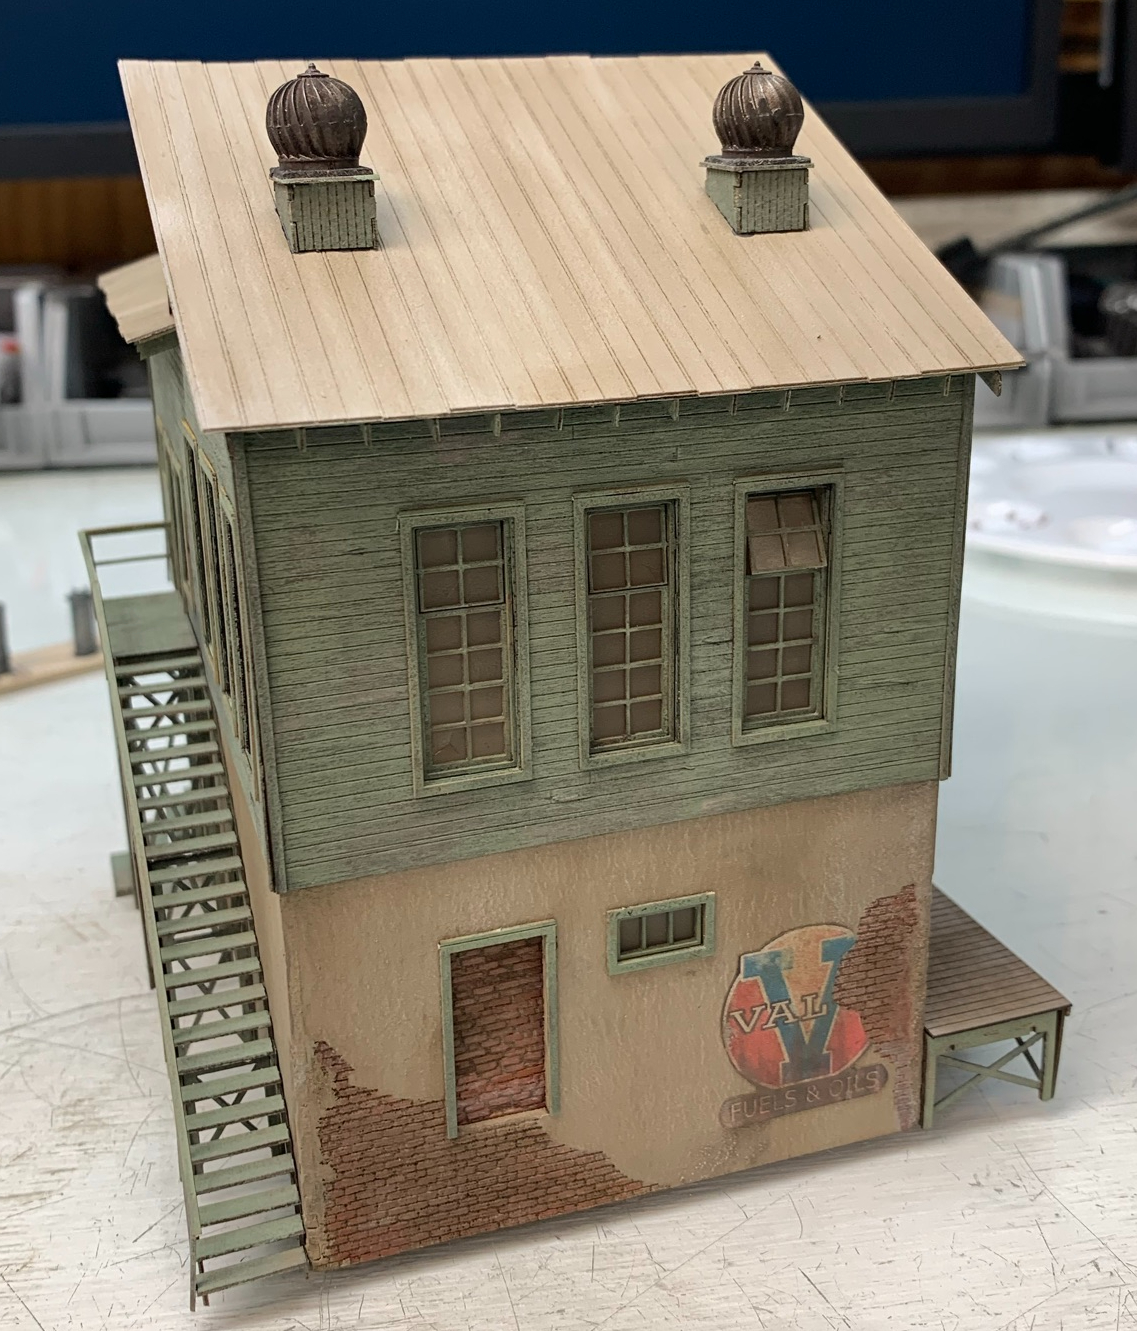
Further back in the same area.


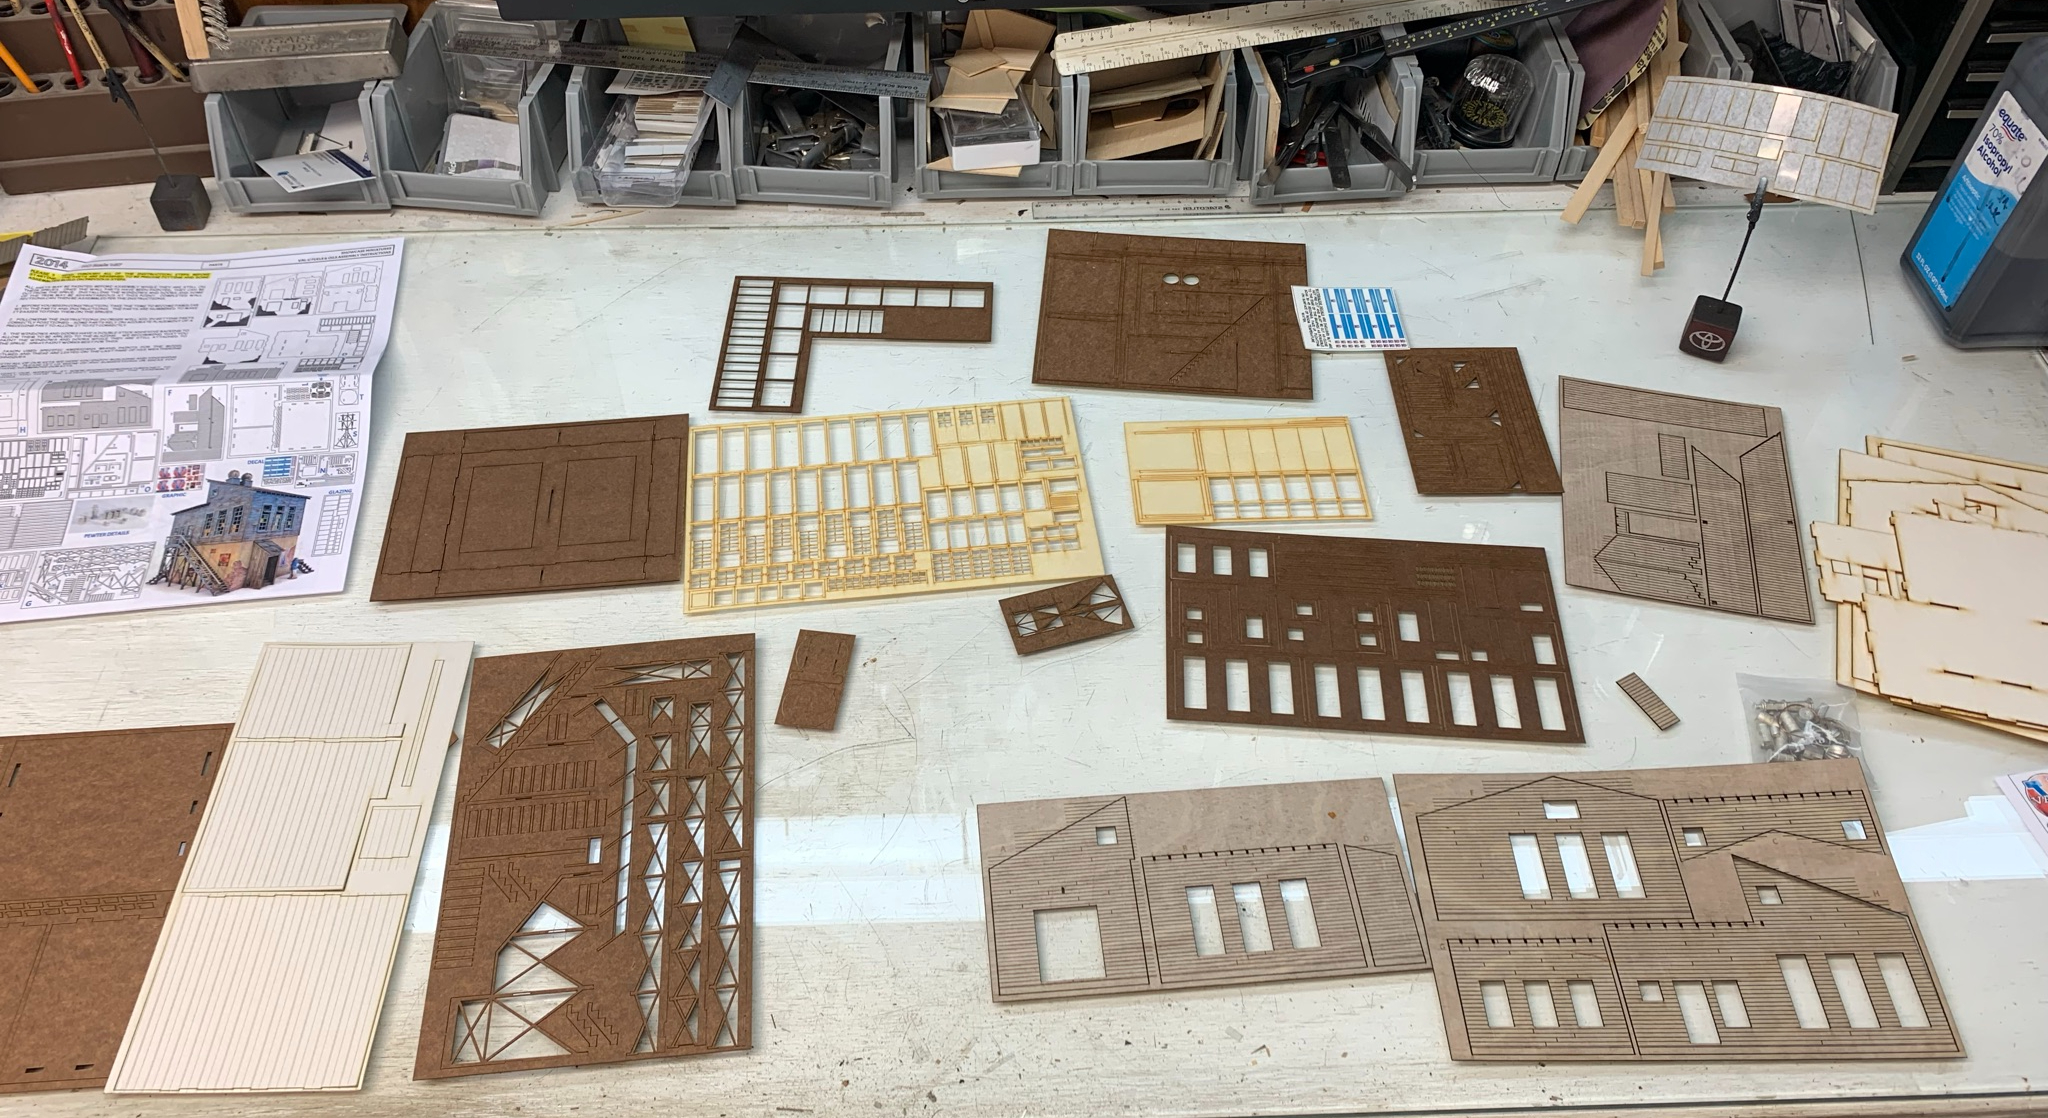
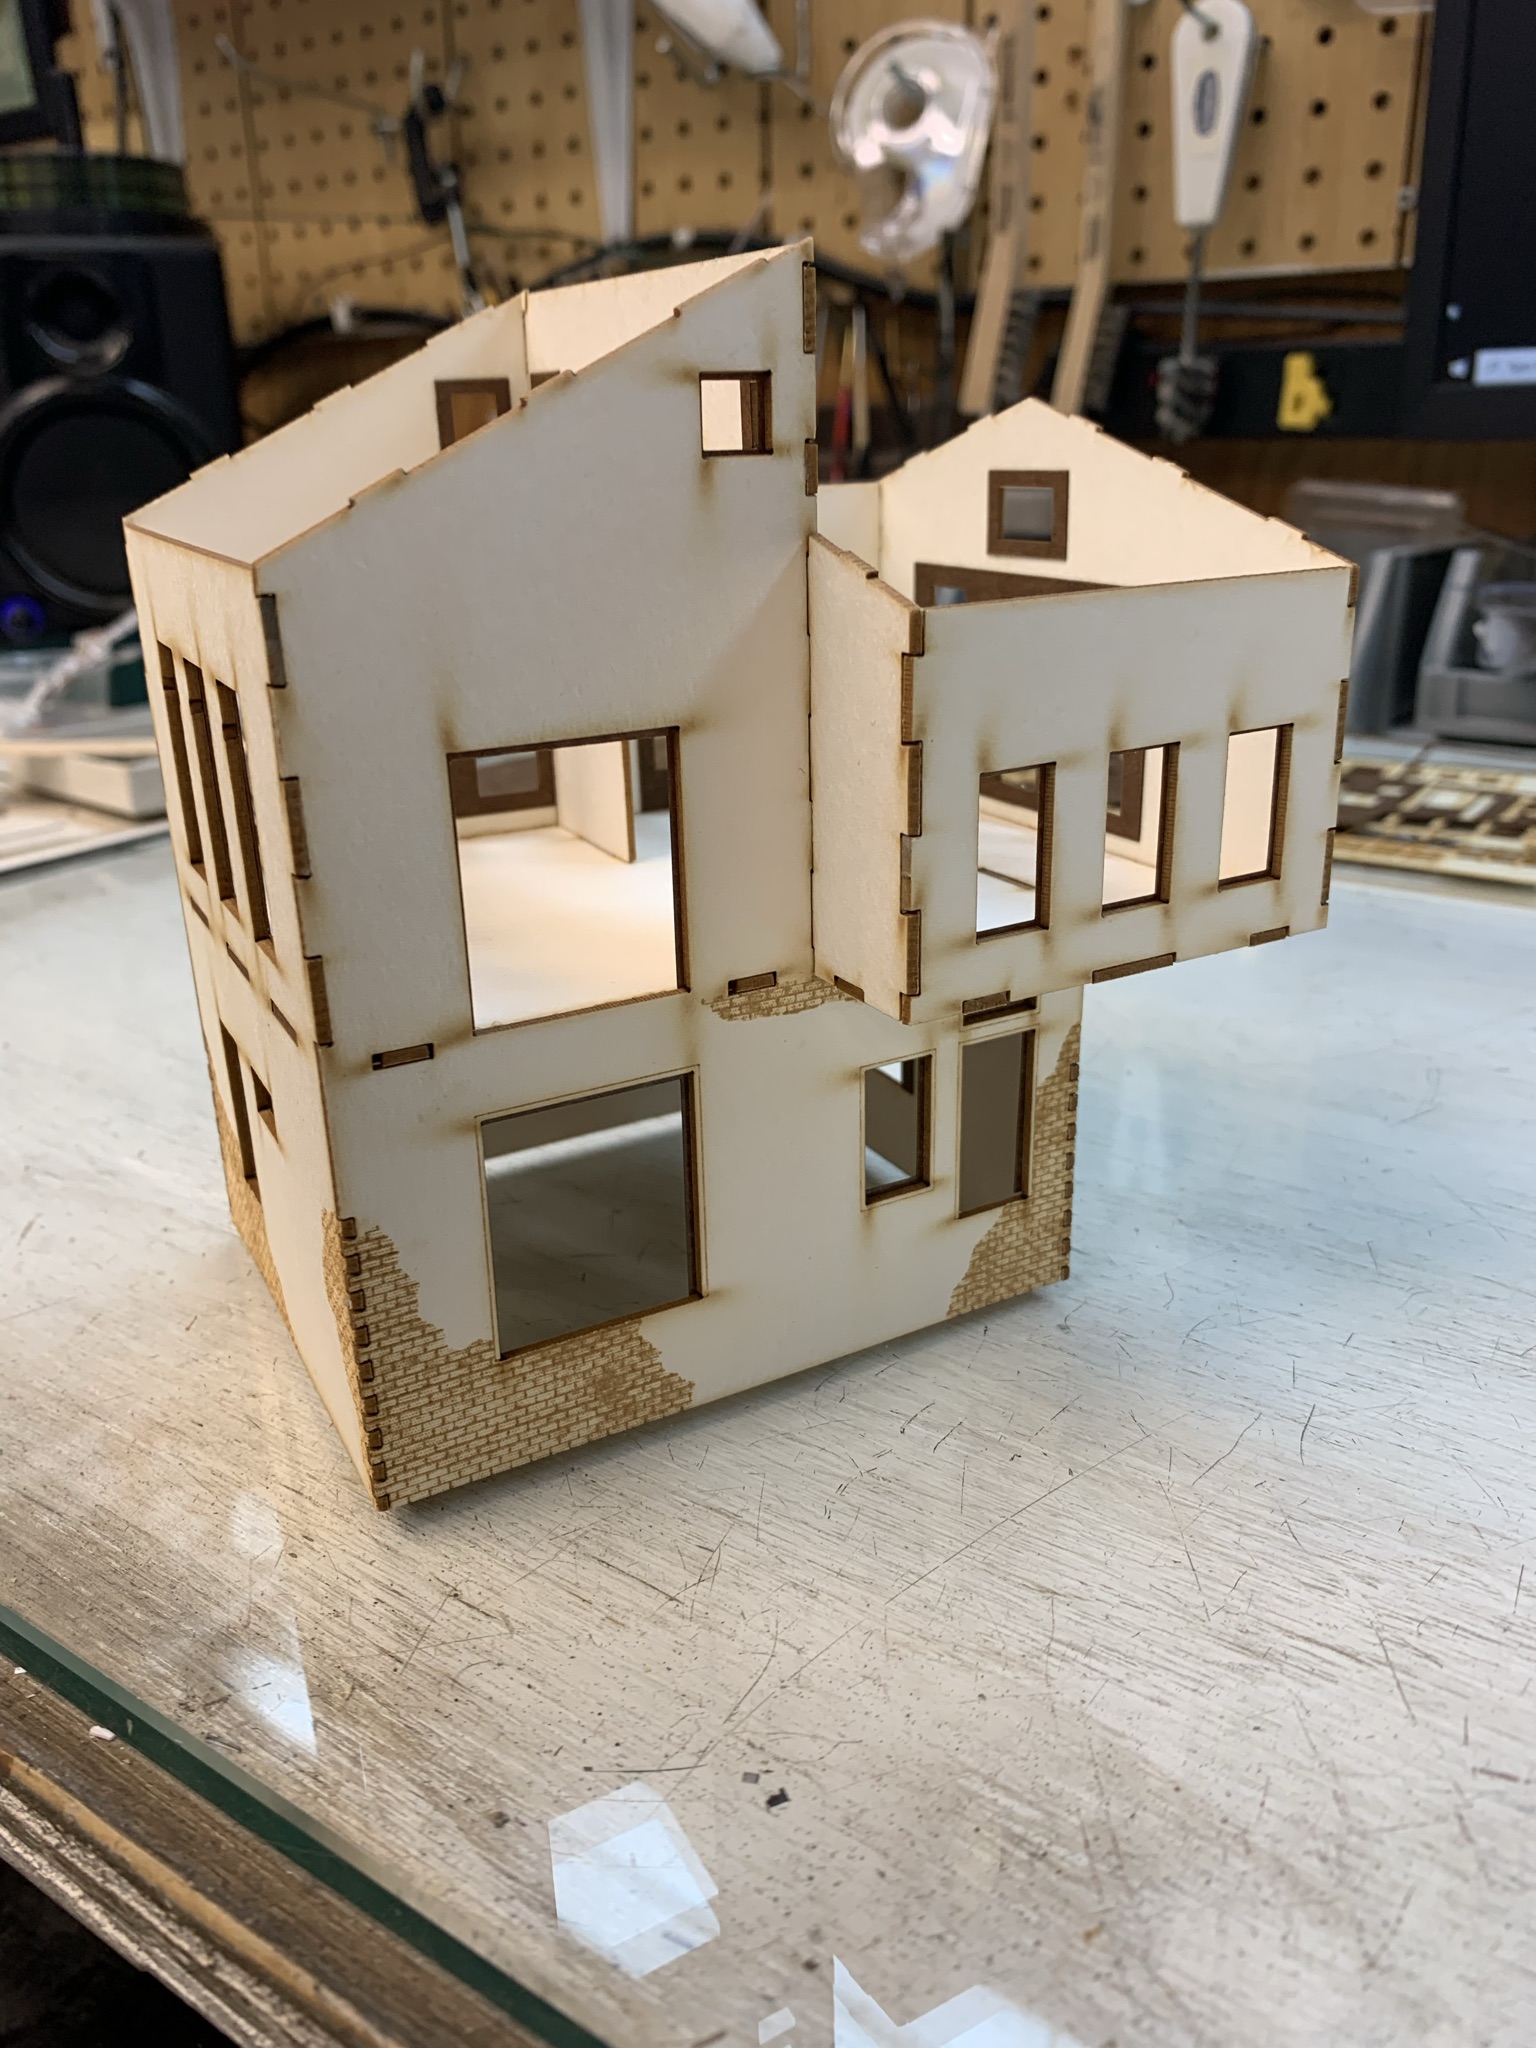
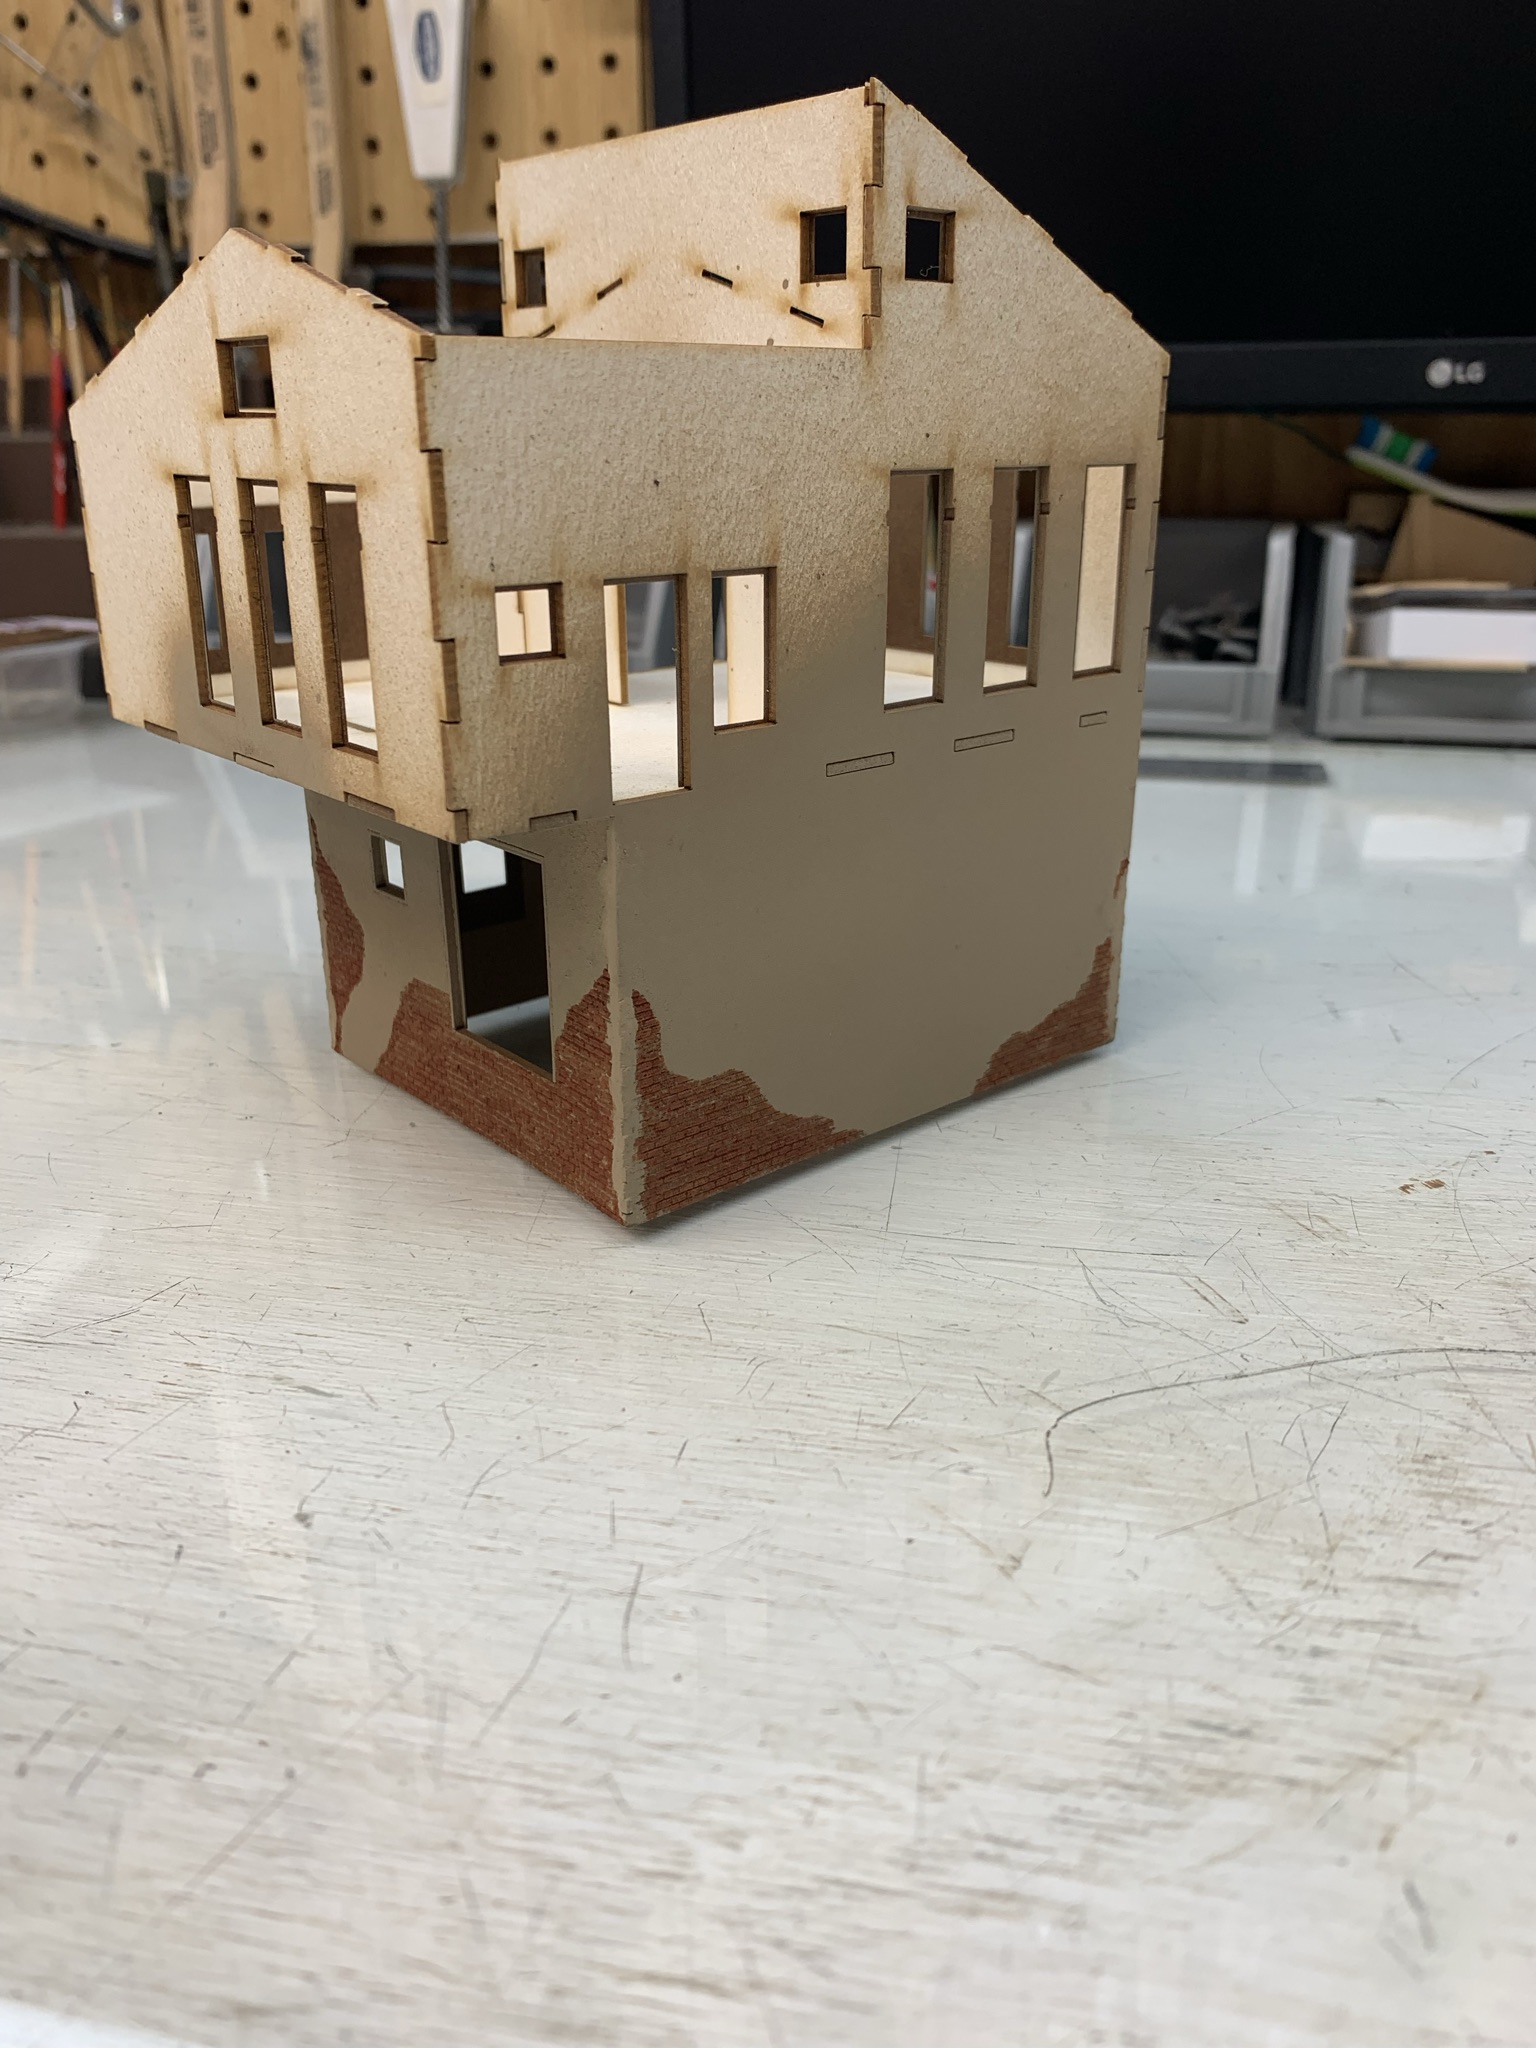
That's it for this one. Overall, it's a nice kit for a good price. Easy to put together and everything fits well.

Thanks for following along.

#17
Kit Building / Re: Showcase Miniatures Val-U Fuels
January 25, 2022, 12:14:12 PM
Thanks Curt and Jerry!

Jerry, you're definitely right about the dock weathering. The laser cut dock assembly is incredibly fragile, so I'll probably wait until I get it glued down with some heavy castings to add some more weathering. Same goes for the staircase - extremely fragile.
#18
Kit Building / Re: Showcase Miniatures Val-U Fuels
January 24, 2022, 09:54:43 PM
Thanks Karl!

I mostly finished the kit up last night. A few small things to do before I put it on the layout then I'll do a full detail of the docks and the area around it.


Looks like I still need to weather the steps and bit more. The bricked in doorway was done because that area will sit directly next to a hill so the provided door and steps down won't work on my  layout.


Over the weekend I painted up a few hundred castings for the area around this building and the service station I'm working on in my layout thread. As soon as the plaster road is done I'll drop this in place on the layout and tie it in.

Thanks for following along and all the positive feedback along the way!


#19
Kit Building / Re: Showcase Miniatures Val-U Fuels
January 21, 2022, 11:50:34 AM
Thanks everyone!

I've been working on the kit a little bit here and there the last couple days. I did run into a little bit of an issue - after the peel and stick walls were stuck on for a day or 2 they started to pull off in a few areas. I did do a few different solvent washes on the walls before I installed them so that may have weakened the self-adhesive. I ended up just peeling the siding back and adding some wood glue to the troubled areas then holding them with clothespins overnight. So far, no more issues. I'm not a huge fan of self-adhesive parts for this reason, especially larger ones like these.


I put together the loading dock, added the roof cards and the door and window exterior trim. The loading dock needs a little more adhesive in a few spots and the decking needs more weathering.


I started to put together the staircase assembly. It's all peel and stick pieces sandwiched together. It was a little challenging getting everything lined up without accidentally sticking the fragile pieces together.

More to come...


#20
Kit Building / Re: Showcase Miniatures Val-U Fuels
January 19, 2022, 07:29:57 AM
Thanks everyone!

Mark, I agree with you about the stucco on the corners being the first to drop off but I'll end up covering most of it with details or vines etc so you won't really see it. It's a lot harder to hide those finger joints in my opinion.

Jerry, so far it appears that it really doesn't need any. Seems like the cross supports that make up the floors keep everything true.


The siding is done with these self adhesive sheets. I gave them a wash with A&I and I left them on the sheet for weathering.


I coated the siding in Mineral Spirits before applying a coat of green paint.


I used tape to pull the paint off the siding. The Mineral Spirits keeps it from adhering well.


The windows and doors are all laser cut. I washed over them with a mix of chalk and water to give them a dirty base. I primed them with Earth first.


In order to achieve a peeled paint on the windows and doors I painted them with a torn off piece of makeup sponge.


The windows and doors are colored.


The walls were washed with A&I to dirty them up a bit.


Acetate glass was first sprayed with dullcoat then dirtied with dry chalk.


The windows are built in layers, this is the first part and they need to be added before the siding.


The top portion of the windows are movable and they don't get any glue.


This top frame piece holds the top window in place.


I went around and installed all the windows.


The siding was installed. It's peel and stick so it was super easy.


All the siding is in place. I still need to add the corner trim to fully pull the siding together.


I'm really impressed with the precision of the laser cut parts in this kit. Everything fits together perfectly and the engineering of all the parts are very well thought out and easy to work with.


#21
Kit Building / Showcase Miniatures Val-U Fuels
January 17, 2022, 08:44:20 AM
Hello everyone,

Next in line to be built is a kit by Showcase Miniatures called Val-U Fuels. This is the first kit I've built from this manufacturer but so far the quality looks excellent. It's very similar to a Bar Mills or Fos kit they only difference I've seen so far is this kit uses all laser cut windows and doors instead of a mix of laser and plastic castings. The kit also included about a dozen decent quality white metal castings. Unfortunately I forgot to take a photo of the castings before I mixed them in and primed them with about 200 other castings I plan on painting at the same time.

The kit was $89.95 w/ free shipping from https://www.showcaseminiatures.net/


The photo of the kit on the box was built by Jason Jensen and he did an excellent job as usual. The kit includes coloring and weathering instructions from Jason as well. I plan on coloring and weathering the kit my own style but if you wanted to follow Jason's example it's very well done.


Everything laid out and ready to get started.


First step is adding these brown backers to support the windows so they don't fall into the structure.


They are peel and stick and get stuck on the inside of all the walls.


The building has a laser cut core made from what I think is called fiber board. I've seen this material used in other kits. It has a little texture to it so it will represent the stucco bottom but the siding gets glued to it for the top half.


All the walls are glued together. So far everything fits together perfectly.


The corners had a really obvious finger joint so I filled it with some plaster. I sprayed the walls with Khaki on the areas that represent stucco and started coloring in the brick.


Thanks for following along.
#22
Layout Tours / Re: Cypress Creek Railroad
January 14, 2022, 09:23:30 AM
Thanks John and Mark!

#23
Layout Tours / Re: Cypress Creek Railroad
January 13, 2022, 08:48:54 AM
Thanks everyone!

Jerry, I built the bridge from scratch using a local covered bridge as an example with some inspiration from the one on the F&SM. I'm glad you like it!

Curt, No the creek with have water but it will probably remain dry until I finish almost everything else in the area around it. I don't want to accidentally mess the water up or get any white glue on the surface after I pour it.

#24
Looking good John! I've built this one a few times and it's always a classic. My favorite water tank kit produced.
#25
Layout Tours / Re: Cypress Creek Railroad
January 12, 2022, 09:24:17 PM
Thanks for all the positive feedback everyone!

For todays update I added some rock castings, plaster and some basic ground cover to the river/creek bed. I also added the track that runs to the lumber company.


I added some plaster rock castings and used plaster to make the hills/banks. I also ran plaster all along the bottom of the river.


Basic ground cover is in. I'll still be adding more junk to the bottom of the water plus trees and bushes along the hills.


I glued down the track. I'm working on what I can put in this red area, it's pretty narrow so my options are a little limited. I ordered a kit from Showcase Miniatures I'm going to try to use here. I can't move forward with this area until I get this little strip figured out.


Shot of the area from the other side.


While I'm waiting for the kit to arrive for area above I built this little service station for this area.


Some of you may notice I took major inspiration from the little service station on the F&SM here.

Next on the agenda is the concrete that will run under this service station and then up to the covered bridge. I also need to drop some wiring leads to the new stretch of track and install a few switch machines.

Thanks for following along.
#26
Layout Tours / Re: Cypress Creek Railroad
January 06, 2022, 08:53:52 AM
Thanks Jerry, Curt and John!

#27
Layout Tours / Re: Cypress Creek Railroad
January 04, 2022, 09:57:07 PM
Thanks Karl and Jerry!

I really appreciate that Jerry, I spend a lot of time placing and thinking and rethinking about where things look and feel most natural while also trying to showcase the most interesting parts of the buildings. Your feedback lets me know I'm heading the right direction.

I spent a little time today getting the other side of the river bank built up out of foam.


I needed to add a support under the next diorama but also give myself enough room to still work the area. I added a few cross braces and cut a piece of 2" foam but I left a hole where I could still get in and work.


I marked off where Barnstead Lumber will go. I also mocked up a stone retaining wall. I couldn't afford the space of an embankment here due to the size of the next diorama that will get placed to the left of Barnstead.


I hacked a punch of foam to fill in the area between Barnstead and the other side of the layout. The covered bridge isn't glued down but the supports are. I won't add the bridge till I pour the water.


Different shot of the area.


Shot from the other side.

That's all for today. The glue is drying, and I filled a few rock casting molds. Next step will be filling in the hillside with some plaster.

Thanks for following along and for all the positive feedback everyone!
#28
Layout Tours / Re: Cypress Creek Railroad
January 04, 2022, 01:32:57 PM
Thanks Curt and Greg!
#29
Dioramas / Re: The mine at Holy cross jct.
January 03, 2022, 09:21:50 PM
This looks like a great project. The designers of the game really did a great job with the buildings. I often thought about building a model of the Prinz and Co Slaughter house outside St. Denis.
#30
Layout Tours / Re: Cypress Creek Railroad
January 03, 2022, 02:08:44 PM
Thanks Tom, Tom and Jerry!

Happy New Year to you as well!
Powered by EzPortal